Bathroom
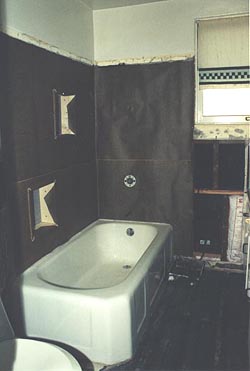
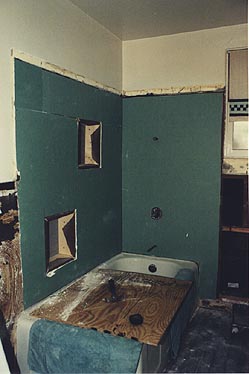
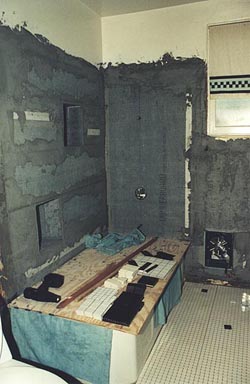
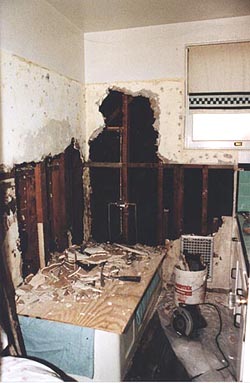
Well you heard all about the involuntary remodeling of the bathroom. Here commences the Saga of Tile-Woman.

Here's what it looked like when I moved in. I swear looking at the clash of yellows with the black and green tile and that awful paisley congoleum on the floor was enough to make anyone constipated the minute they sat on the toilet. I couldn't afford much beyond paint when I moved in, so that's what I did. I painted the walls and cabinet white, replaced the pulls with black and put a green bathroom rug on the floor to cover the eyesore. I basically went with the color scheme rather than trying to fight it.

And here is the result. Looks much better. I made a curtain to pick up the color and got a nice light fixture at Home Depot and replaced the ugly vanity handles. Black vanity accessories and I alternate between black towels or green towels. And I lived with it for 12 years. And I was more than happy to continue living with it as I just wasn't ready to do a full bathroom remodel. Bwa ha ha laugh the Karma Gods!


The Remodel


Demolition begins. You can see I've been removing the old tile and the thick cement bed it was set in. And the plaster walls are coming off too. You can barely see the brand new copper pipe in the wall where the shower head and tub controls will be. And you can see there is NO insulation in the walls. (And yes I am brilliant....I have a piece of plywood over the tub while I work so I don't trash it. No chipped porcelain from me.)

Lookee, lookee! Insulation. And you can see new wood between the studs on the left. Those are the boxes I've installed between the studs.

Here you can see the vapor barrier installed over the studs. You can also see the bare wood floor I had left after removing a layer of congoleum and a layer of linoleum and a layer of tar paper. Bleech. But it was still an improvement over what was there.

Here is the 'greenboard' starting to be applied over the vapor barrier. Greenboard is basically gypsum dry wall however it has a special paper coating especially designed for bathrooms and wet areas. (Blue board is for plaster walls. Plaster doesn't stick to regular drywall.) You can also see the boxes I've built into the walls between the studs better in this picture. I had to apply 1/2" greenboard and 1/4" wonderboard to the walls in order to match the thickness of the existing 3/4" plaster walls.

Aren't you impressed?

Ah! There is tile on the floor! And I've put the cement board (Wonderboard™) on over the vapor barrier and the greenboard and I've used thin set (cement) to patch the cracks between the new cement board and the old plaster walls. You can see the wall tile laid out on the plywood tub cover. And that's my cordless power drill way over on the left.

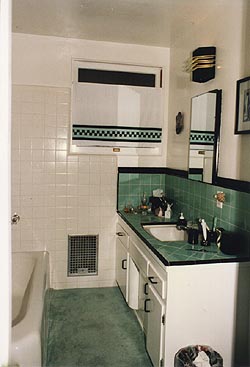
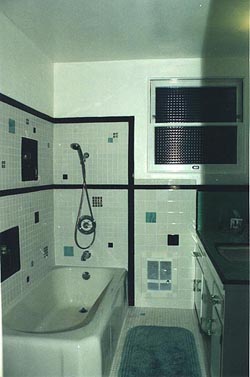
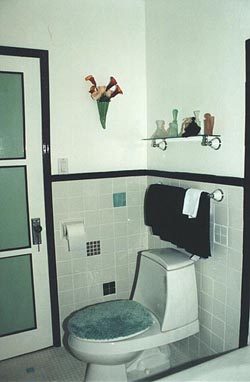
In the "After" picture below right you'll see the variety of tile sizes....1" sq on floor, 2" sq on tub surround and 4" sq on walls....and the variety of color I used. I never was able to match the green so I used stained glass from a local supplier. You can really see the inset tile boxes in the picture as I framed them in black tile. You'll also see the finishing touch....The 'cross threaded' window glass that has been installed in the windows. Now I don't need curtains for privacy and the bathroom has plenty of light.

The bathroom is wonderful now. And the best part is it looks like it's always been this way. Which was the whole point.


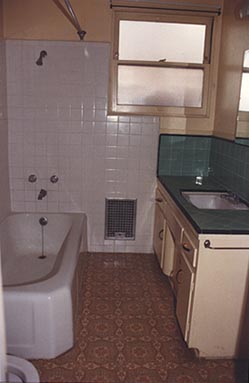
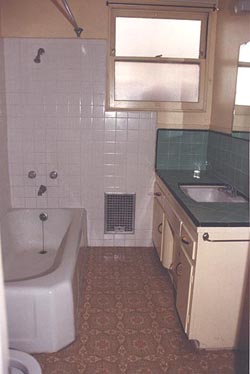
"Before" (condition I moved in)


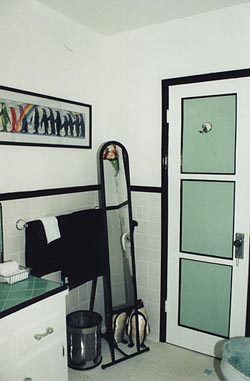
"After" (What it looks like now)


Looking back towards left
Looking back towards right


When you want a job done right....do it yourself.


Sewing Room
Photovoltaic Panels      
Tankless Water Heater      

Mary's Place

Laiuppa Home